I started painting the model by putting on a coat of white Tamiya spray primer – this works a lot better when you put it on a coat of grey Tamiya spray primer:
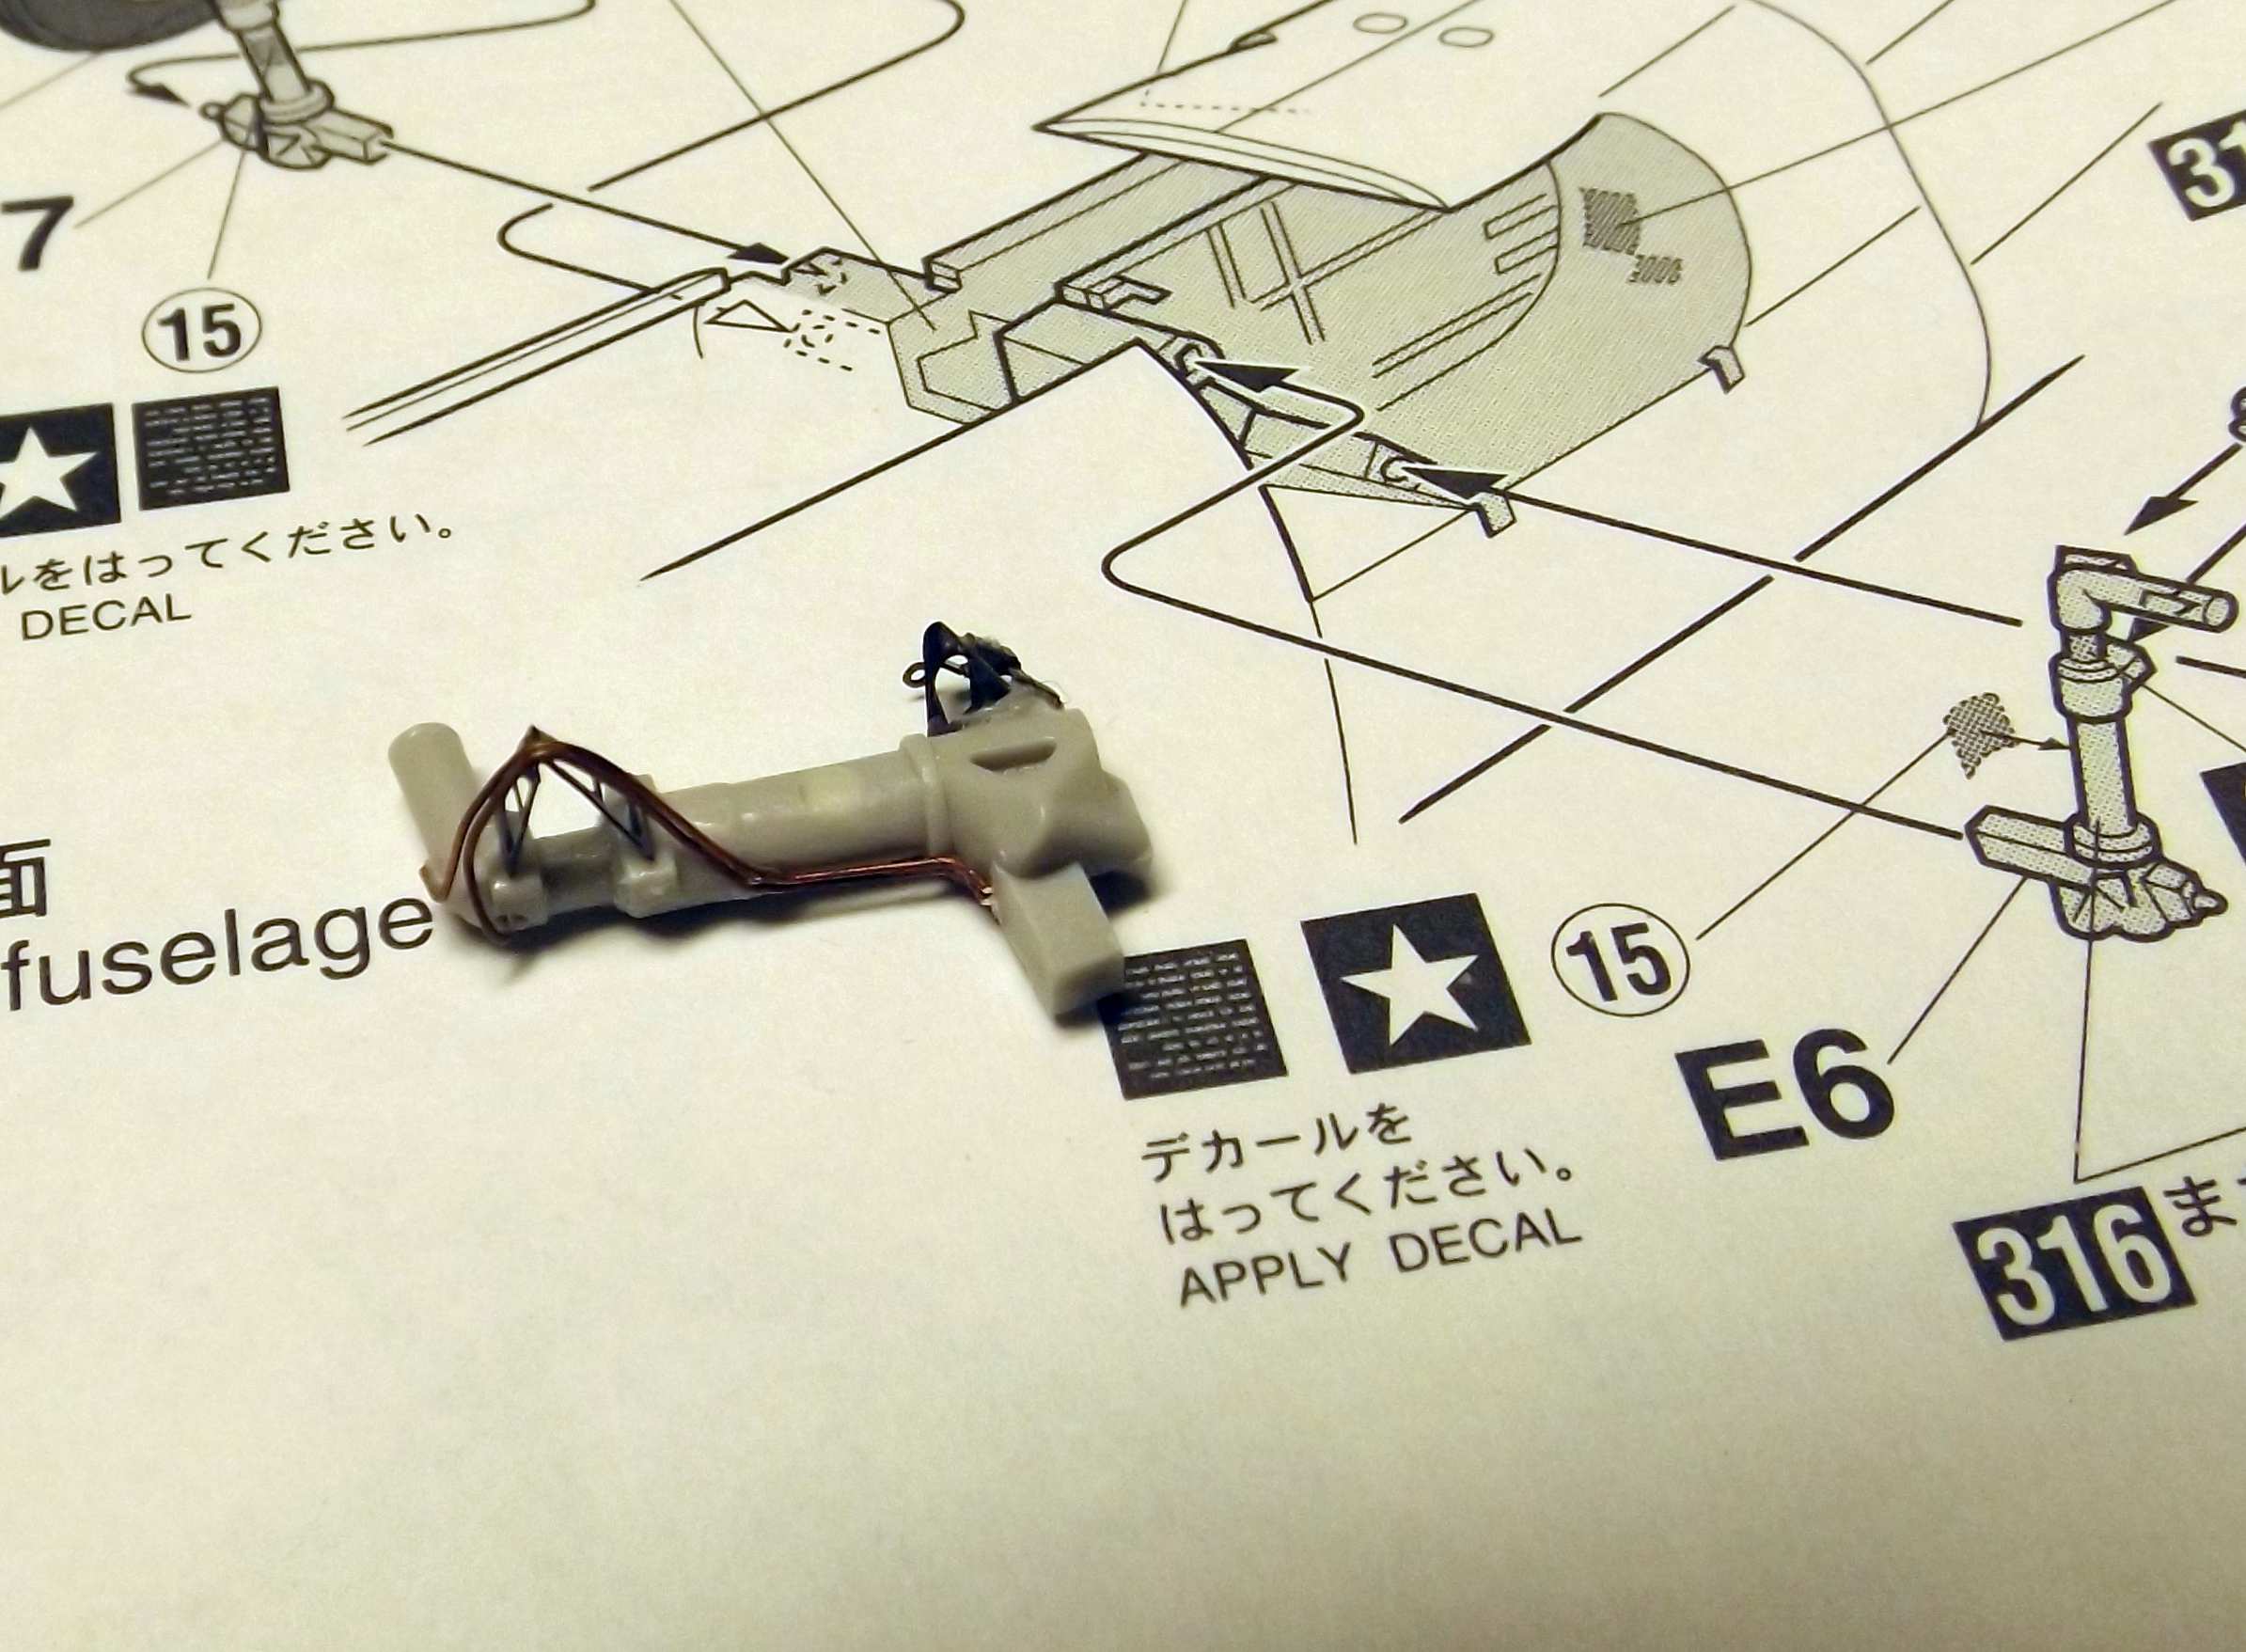
Before that I added yet two small antennae just before the triangular opening in the lower rear hull – I made them very strong, from a thick copper wire, that was flattened, ground with a file and then embedded in appropriately shaped holes in the hull – I just wanted to be sure that they won’t break off while the work continues.
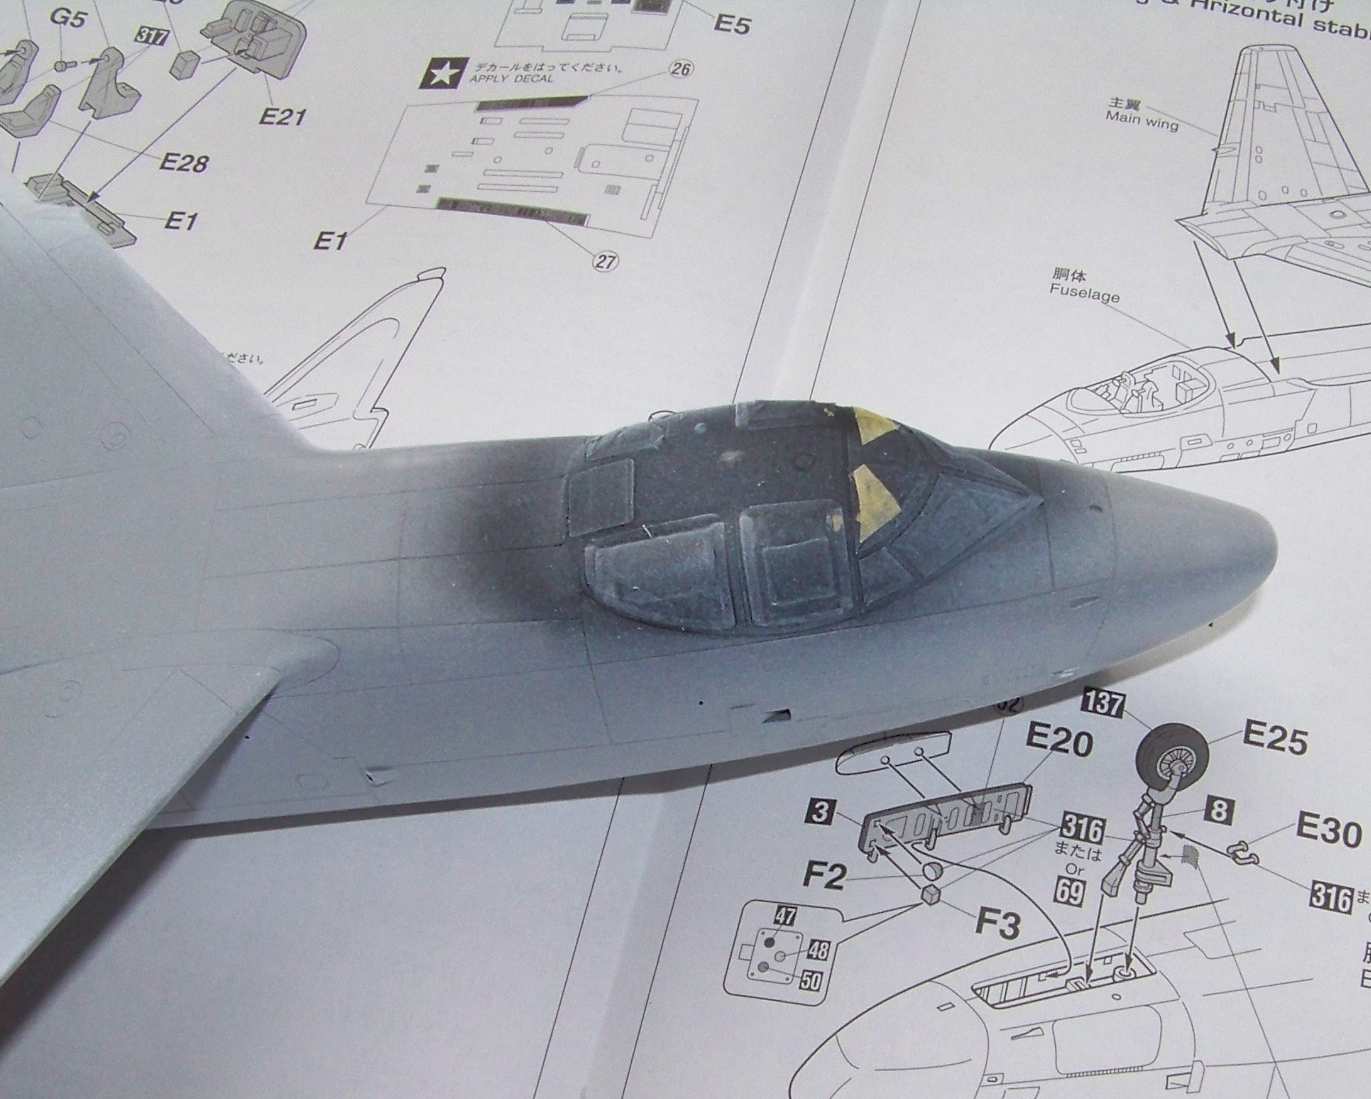
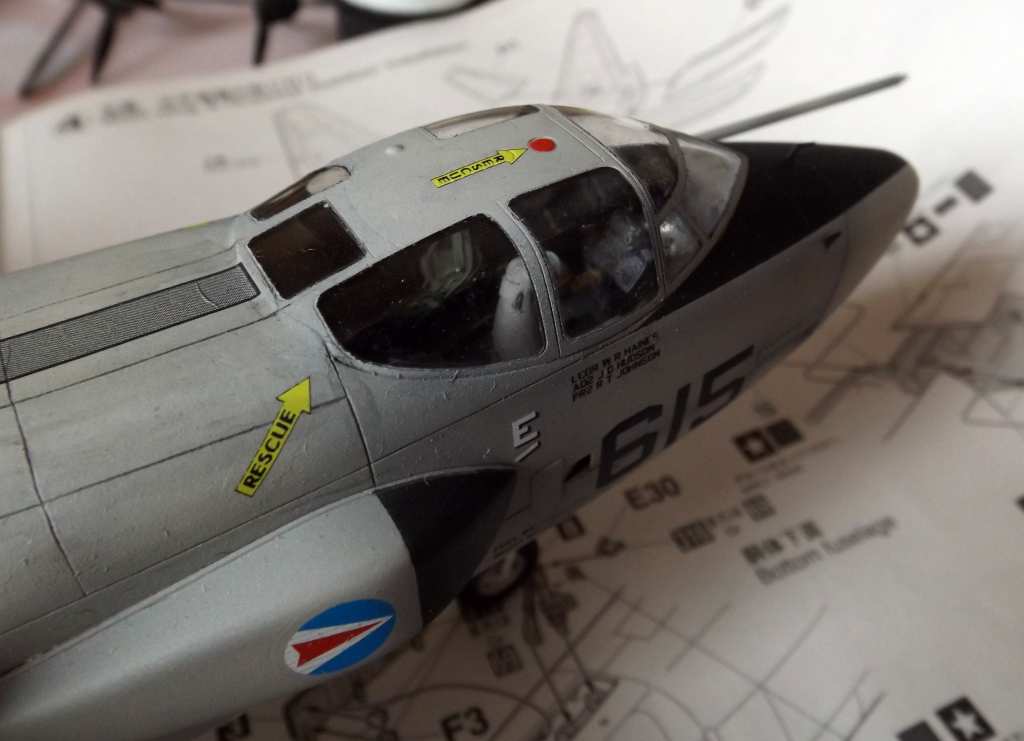
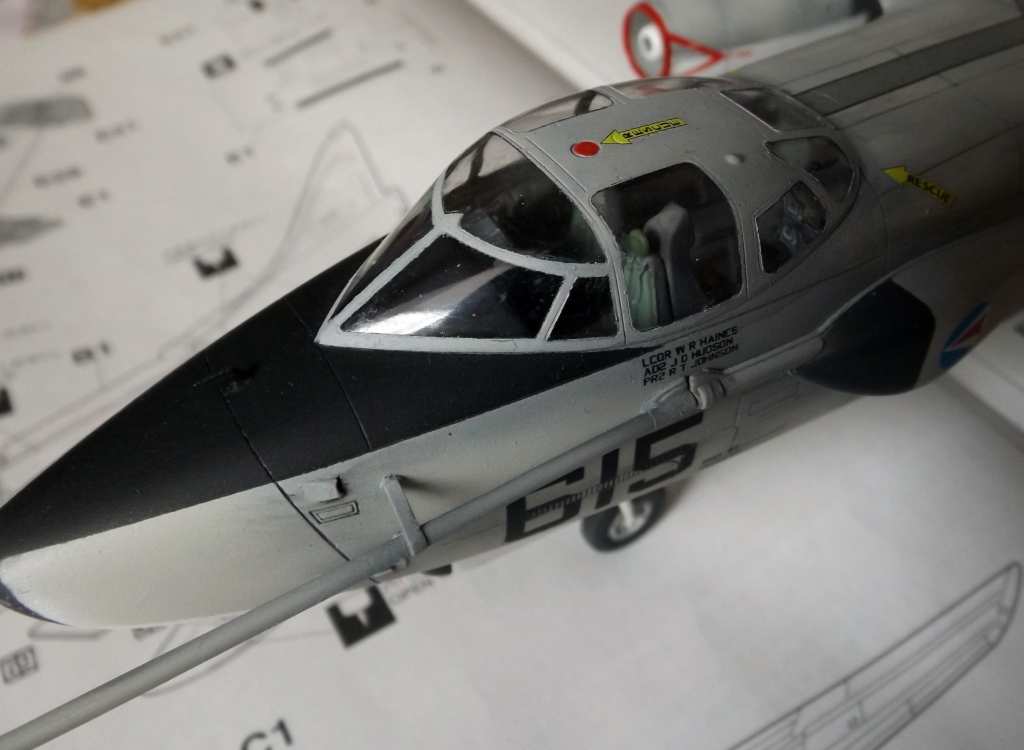
After closing up the cockpit I masked the windows with Tamiya tape and Maskol and then I painted the canopy black, to get the right color of the frames when viewed from the inside. On the photos you can also see the residue from the lighter-colored primer that was applied before.
At this stage I already had the engines in their final colors:
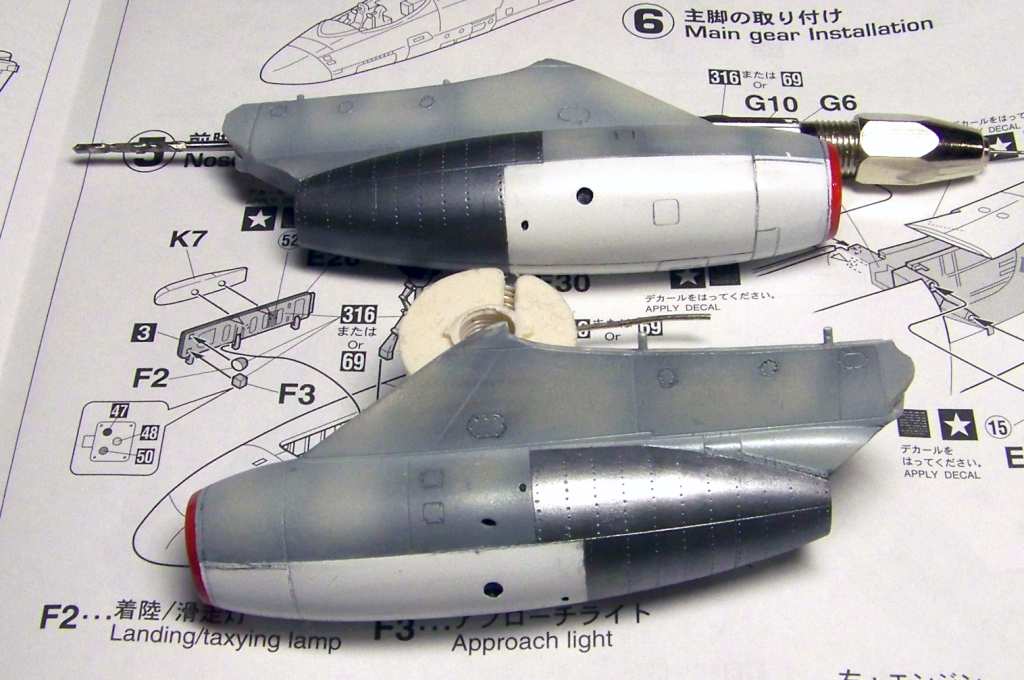
Thir lower surfaces are white Tamiya spray primer, the upper surfaces are light grey Humbrol 129 applied to surfaces preshaded with grey Humbrol 140. The red outlines of the intakes are Humbrol 19, and the rear portion of the engine pods are painted with Gunze Mr Metal Color metalizers, so as to get gradual transitions between Stainless and Iron colors. Some of the panel lines were highlighted with a sharp pencil.
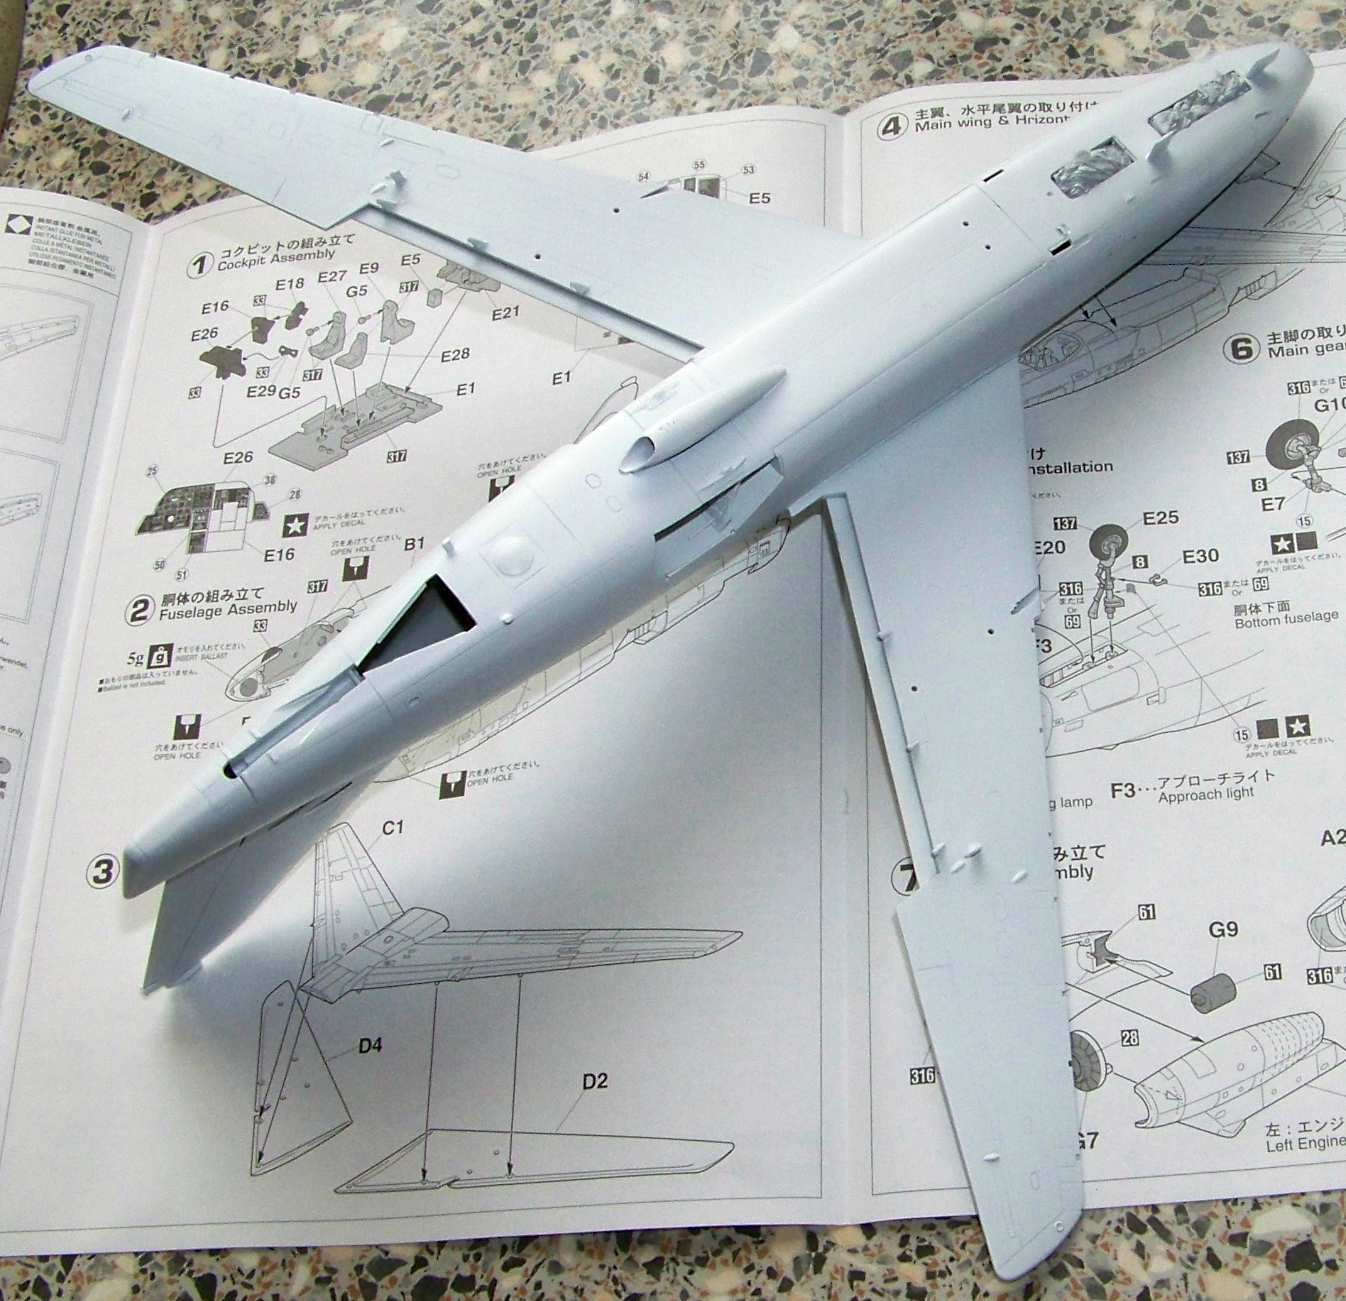
I decided to paint the engines before installing tchem on the model, because after the installation the access to tchem would be very restricted. After the installation only a small joint at the leading edge of the wing was left to fill and sand.
After the installation of the engines I continued to paint the model with results like on the photo below:
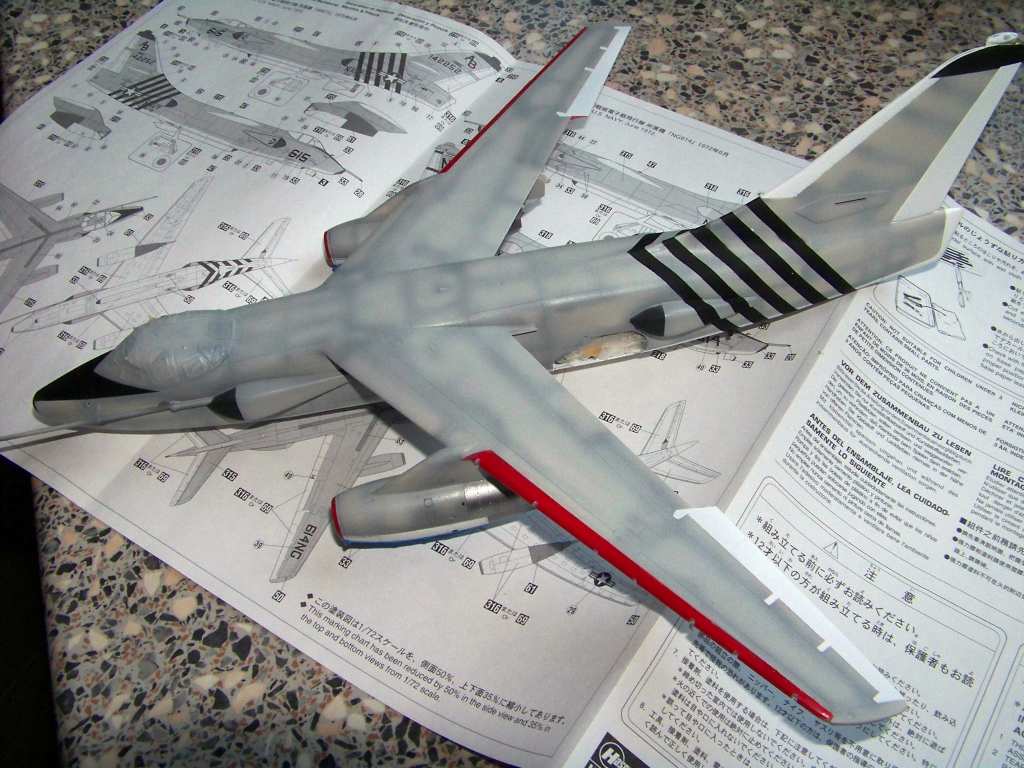

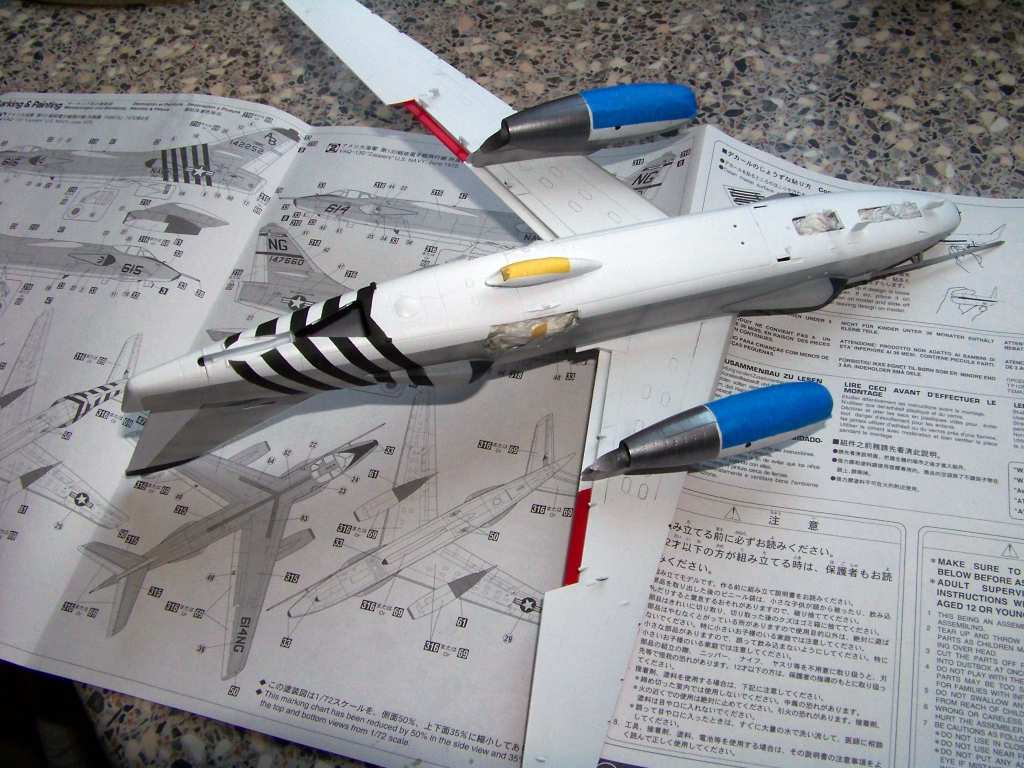
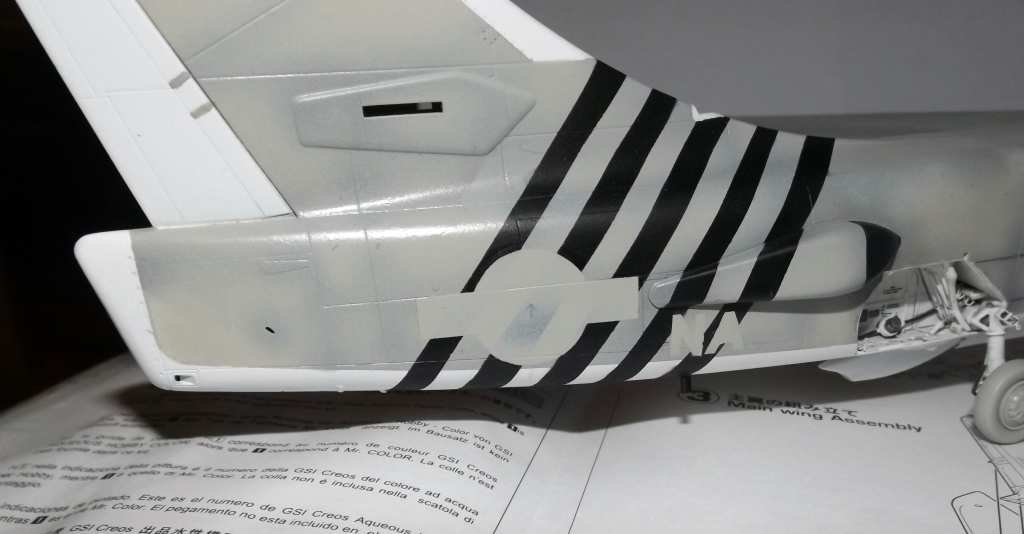
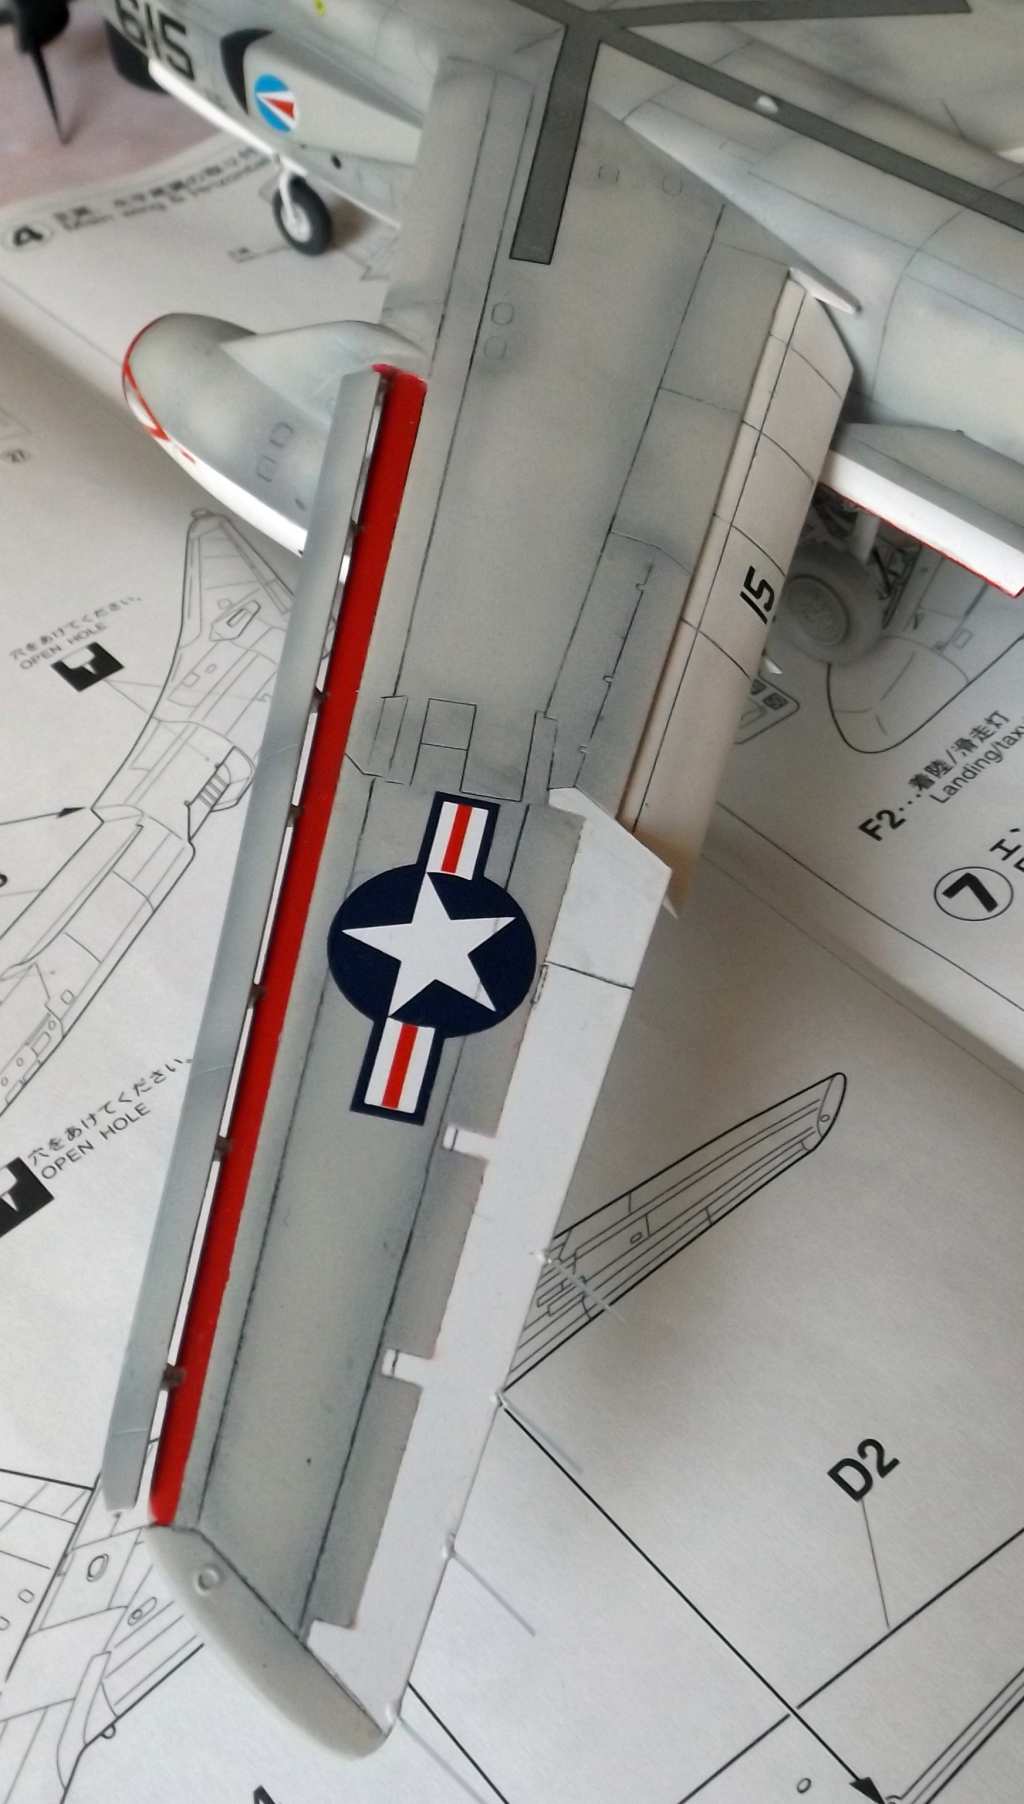
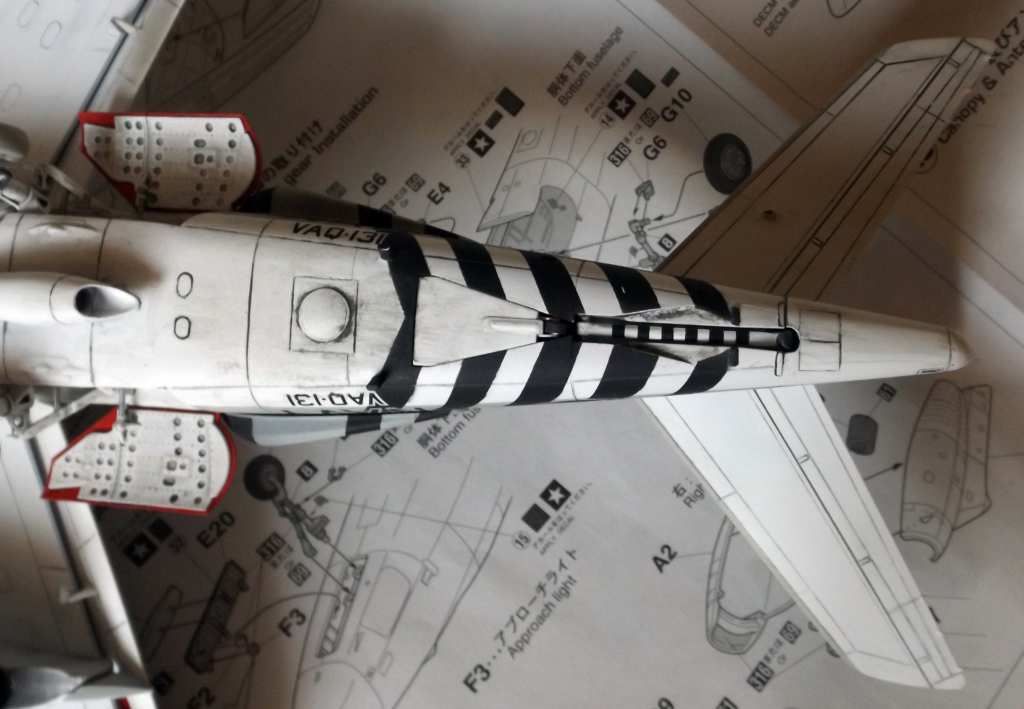
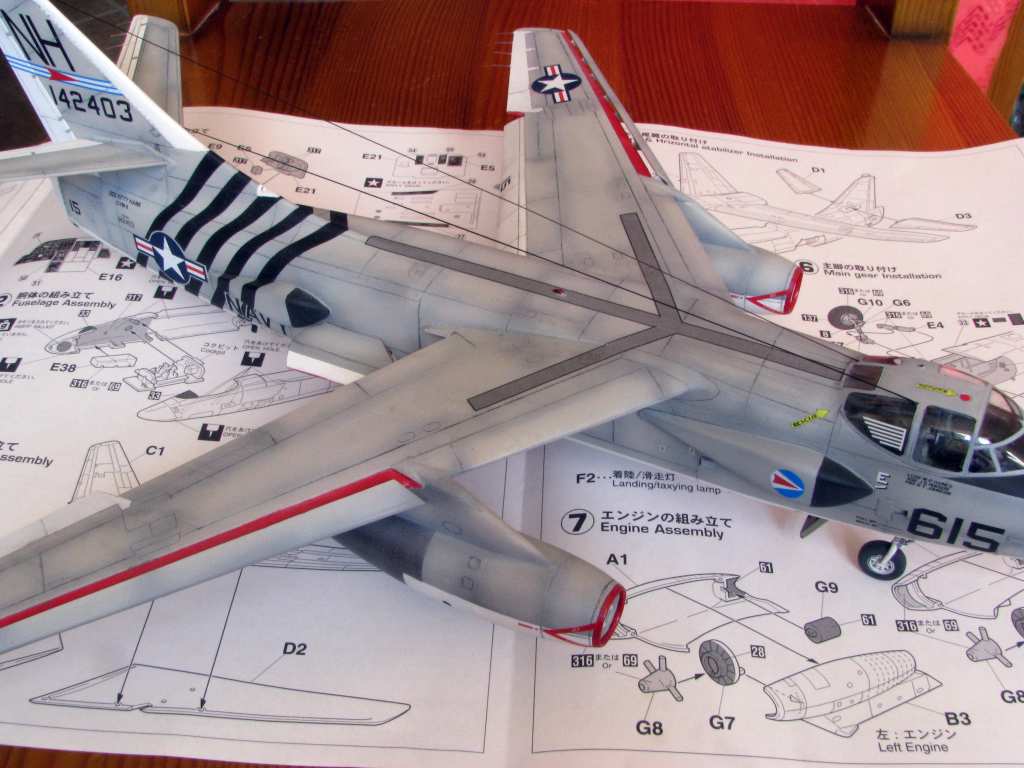
The colors used are the same as on the engines, with the addition of black Humbrol 33 on the anti-glare panel and dark grey Humbrol 32 on the antenna blisters on the hull. The black “tanker” stripes are unique to the VAQ-131 squadron – I decided to paint them on instead of using kit supplied decals, and I decided to modify those anyhow.
I also painted the horizontal stabilizers, still not permanently installed - that saves a lot of masking. To paint them I used the same colors as on the fuselage and wings, and additionally I used a wash made by thinning the dark grey Humbrol 32. After the base colors drieg thoroughly (several days!), the wash was applied roughly to the panel lines, and after drying a little (15 minutes) wiped away using a Q-tip moistened with airbrush thinner (Wamod). The effect can be seen on the photo below:
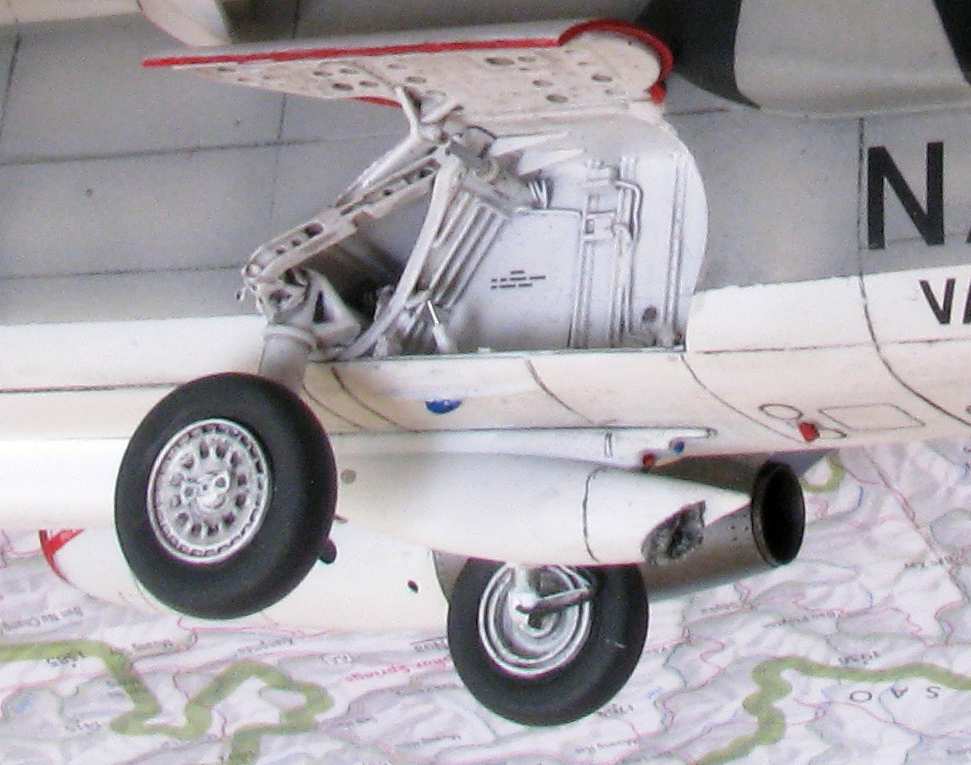
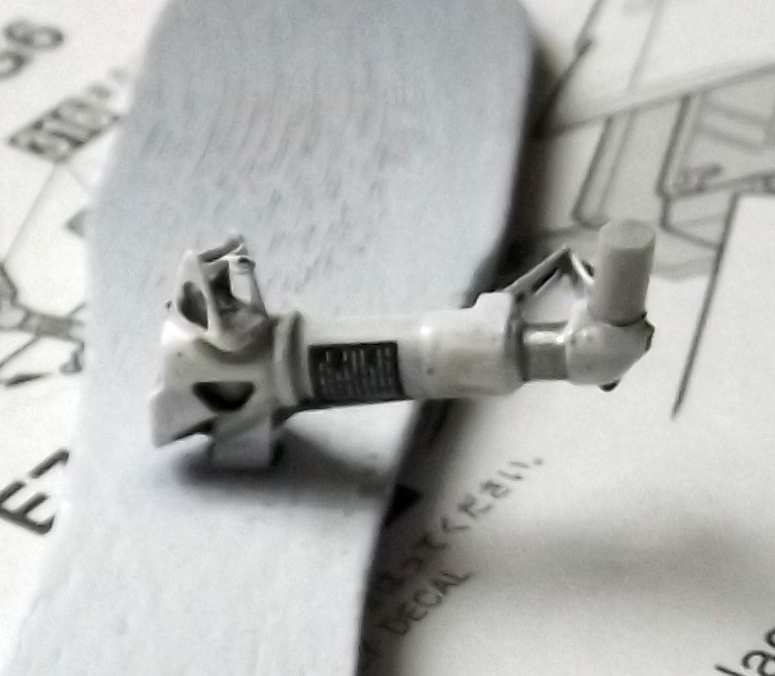
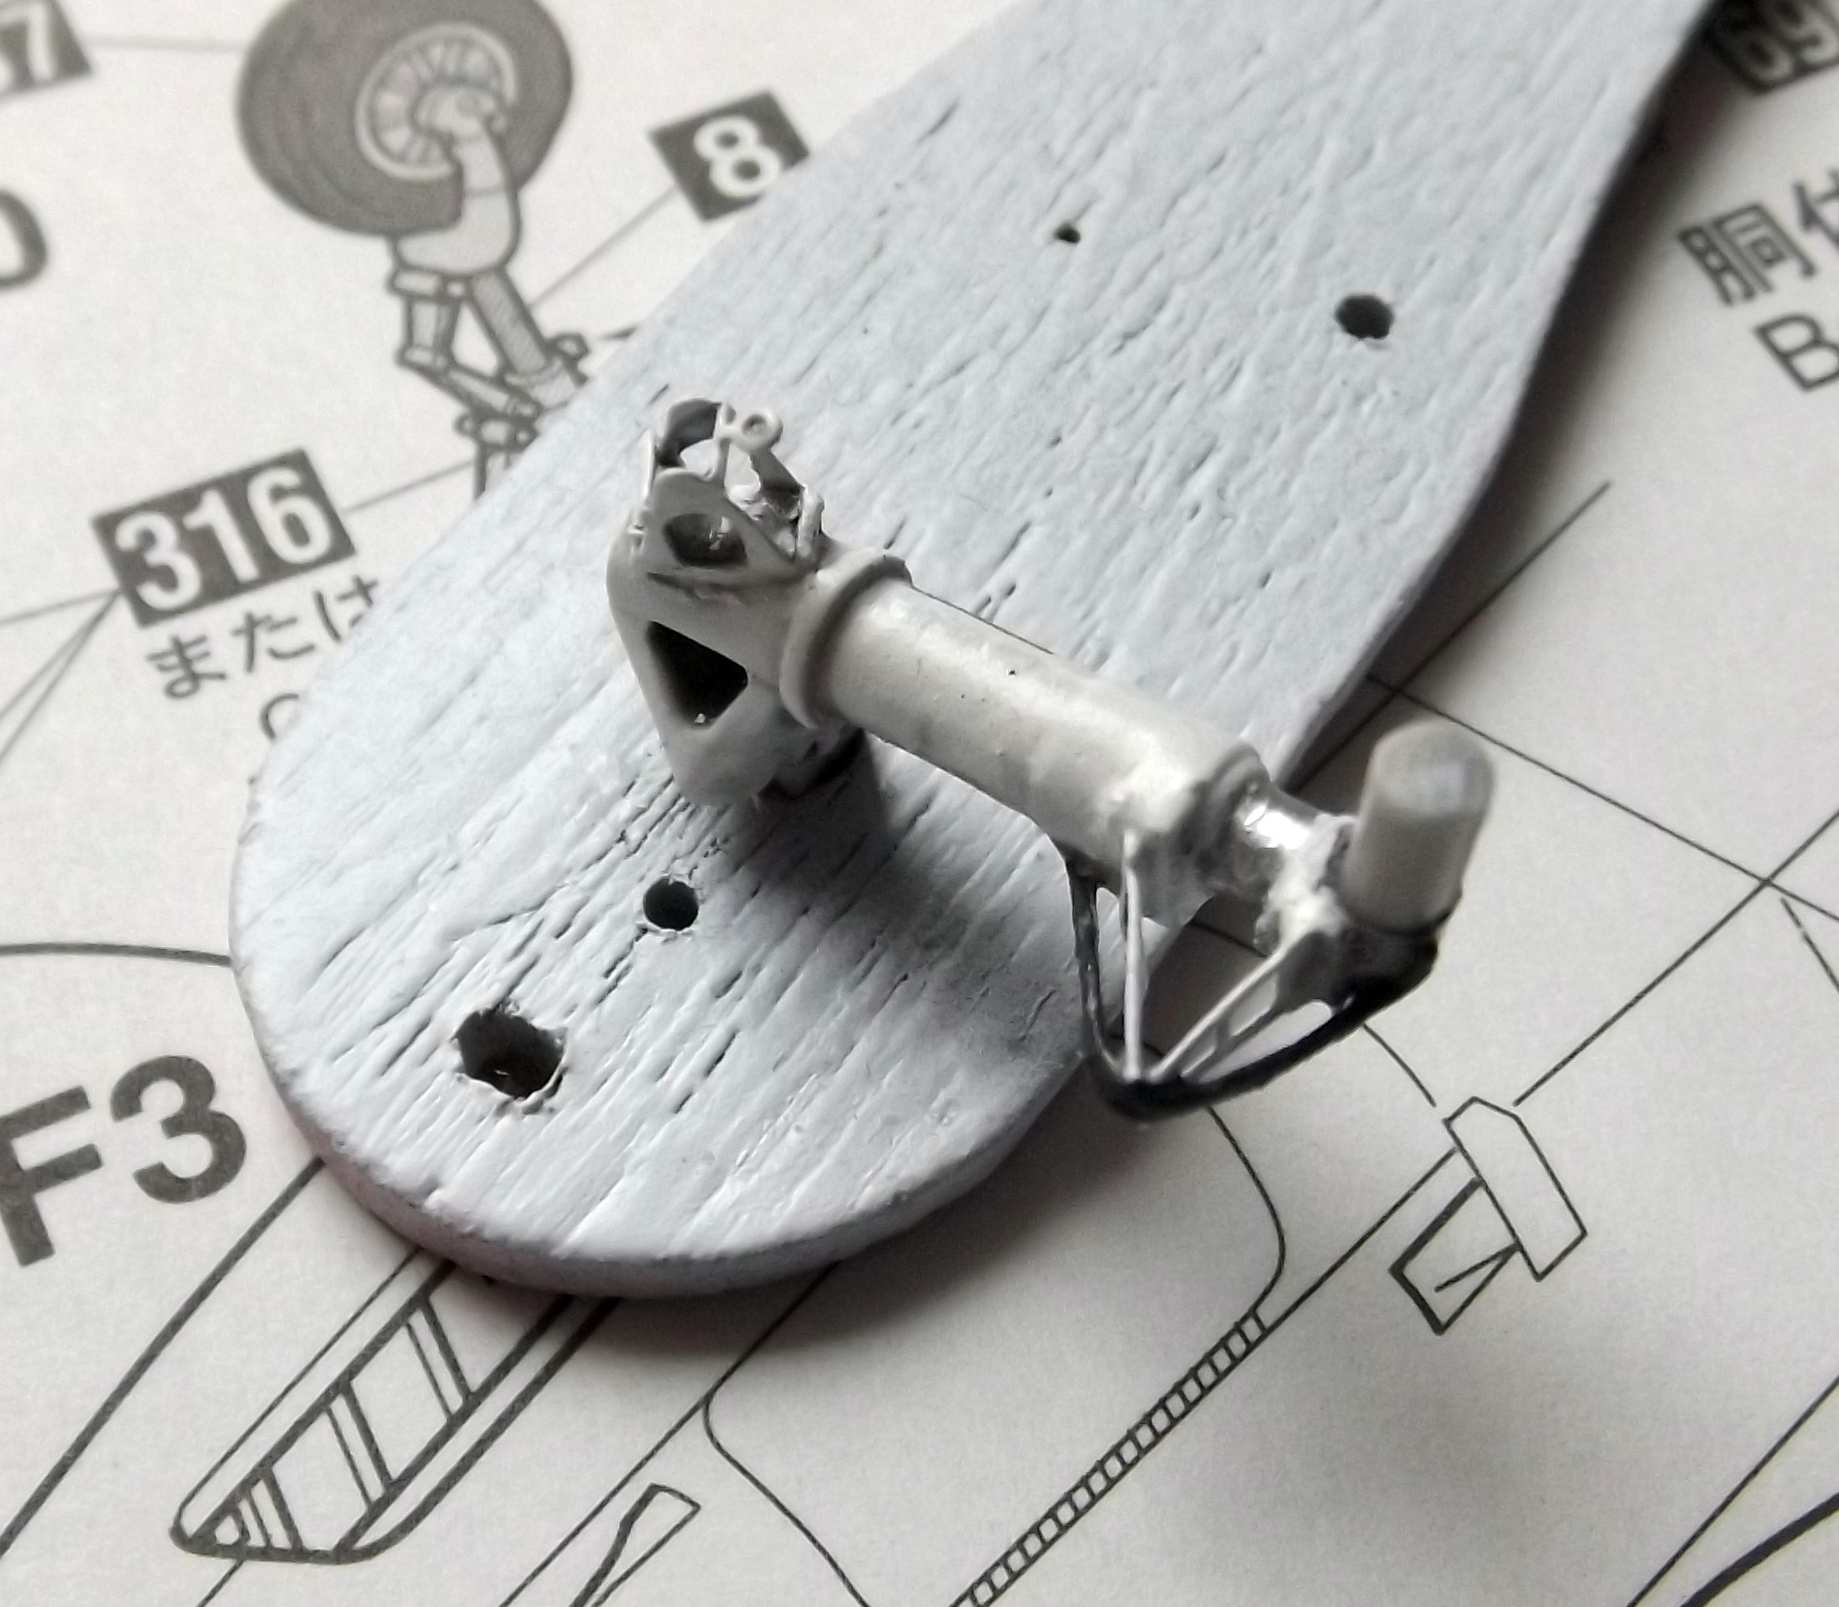
While the paint was drying, I worked on the landing gear. To detail the landing gear I used the Eduard PE parts and thin copper wire:
After painting the landing gear with white Tamiya spray primer, putting on the kit decals and a black wash, the landing gear looks more interesting:
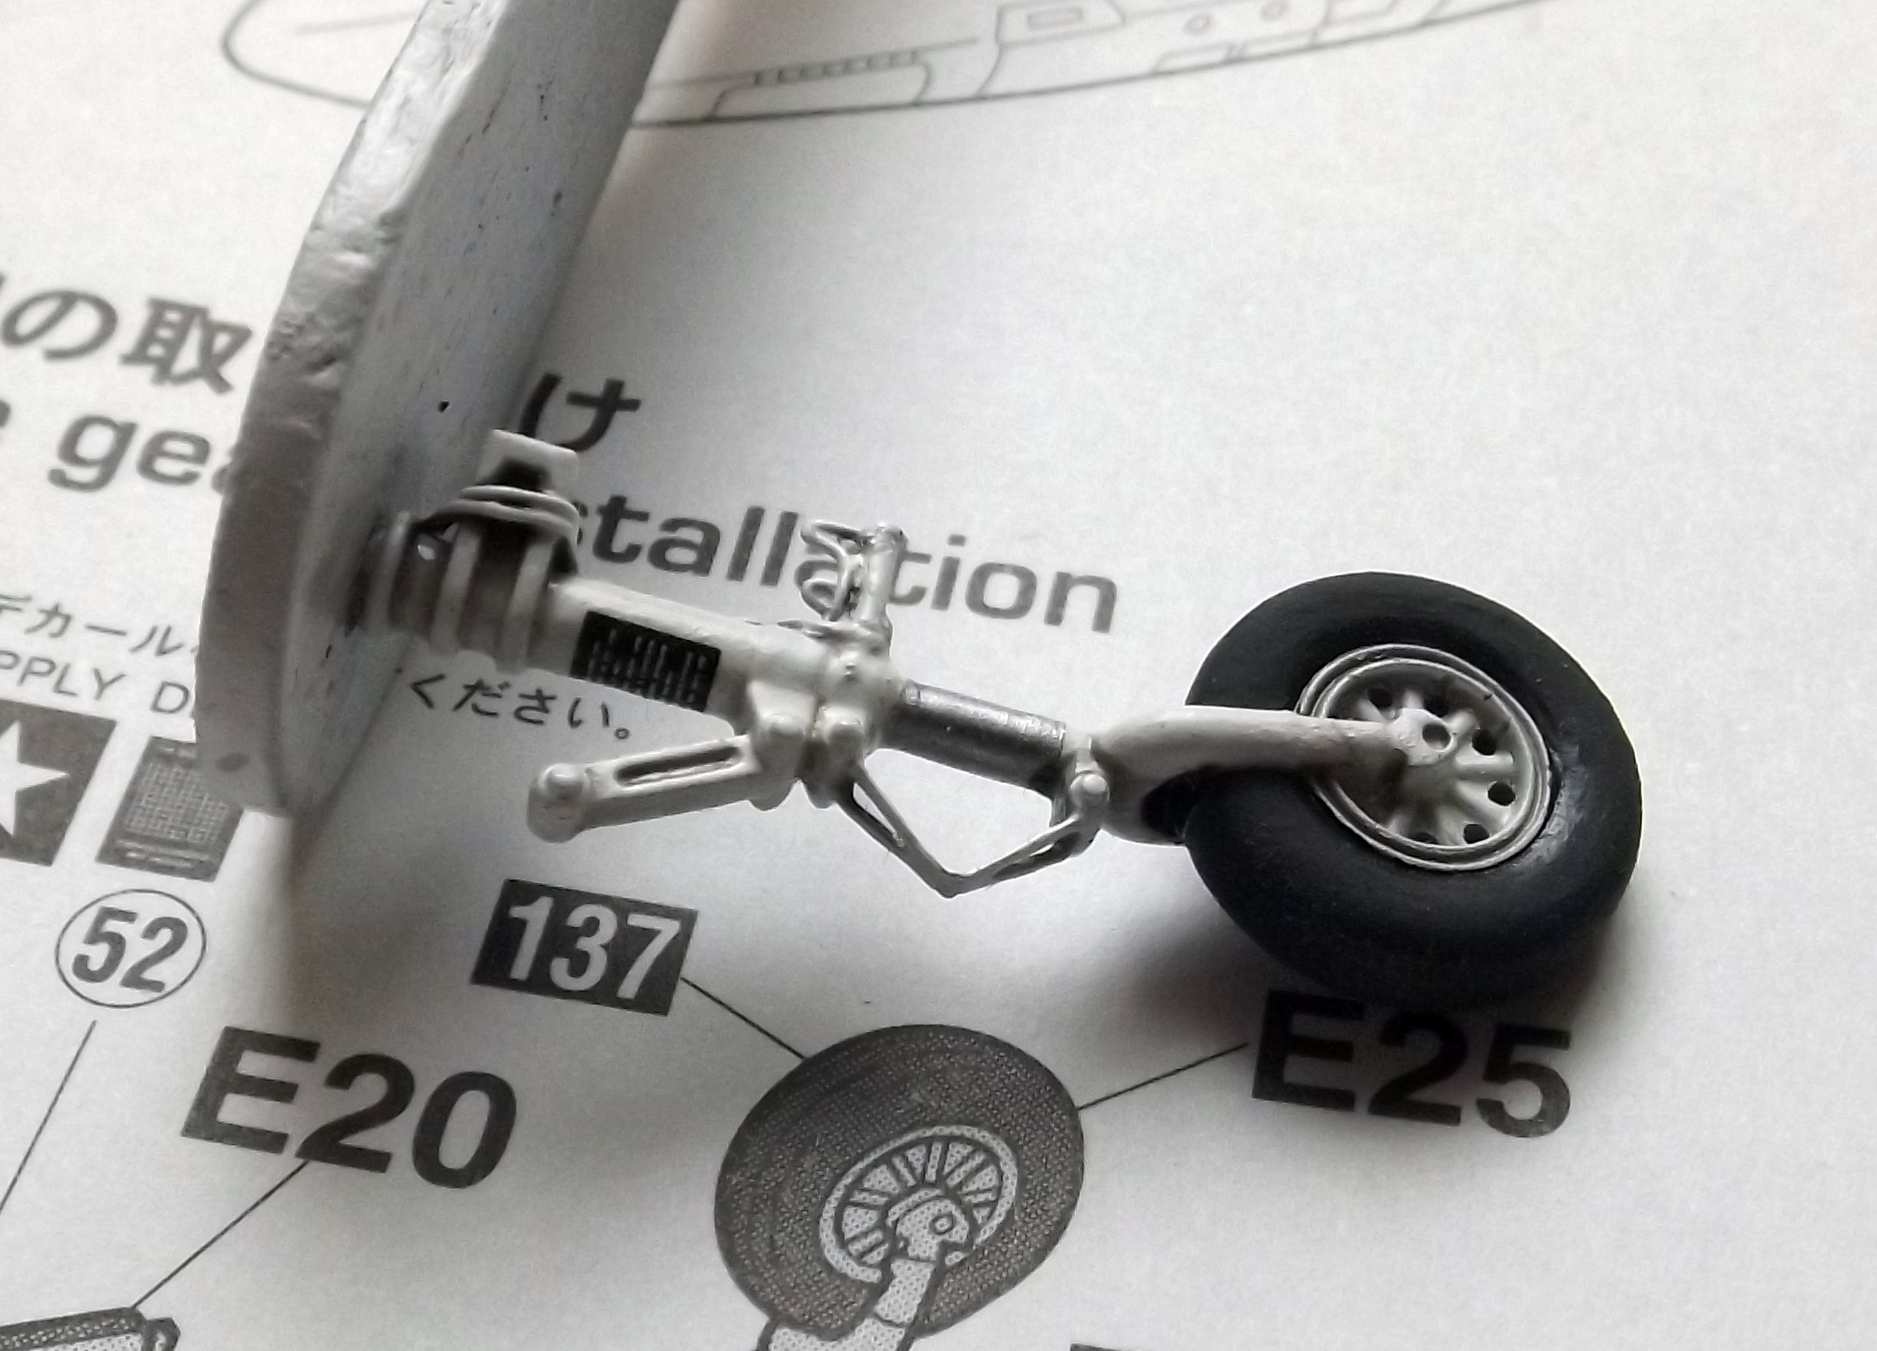
I used similar techniques on the front landing gear:
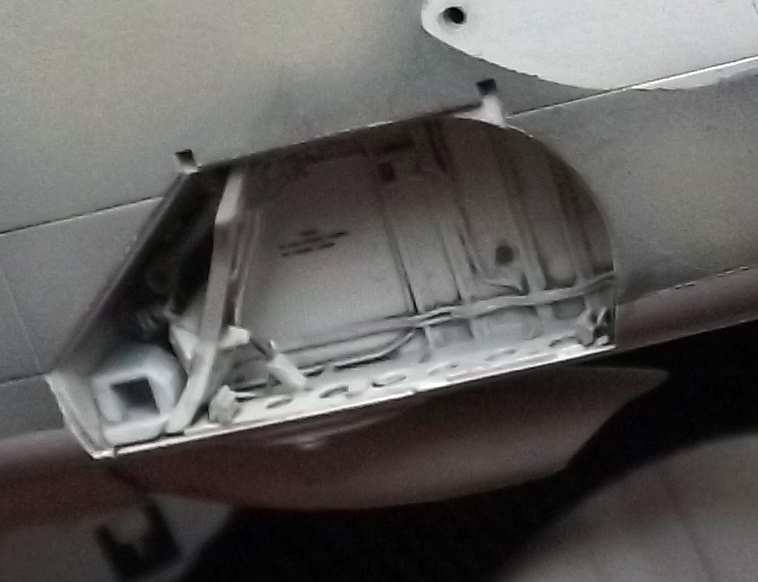
I alo put a lot of work in detailing the gear bays. I scratchbuilt their hydraulic assist actuators for opening the gear, their hydraulic lines and electric lines. In the right bay there are also parts of the fuel system. The kit decals dress this area up nicely:

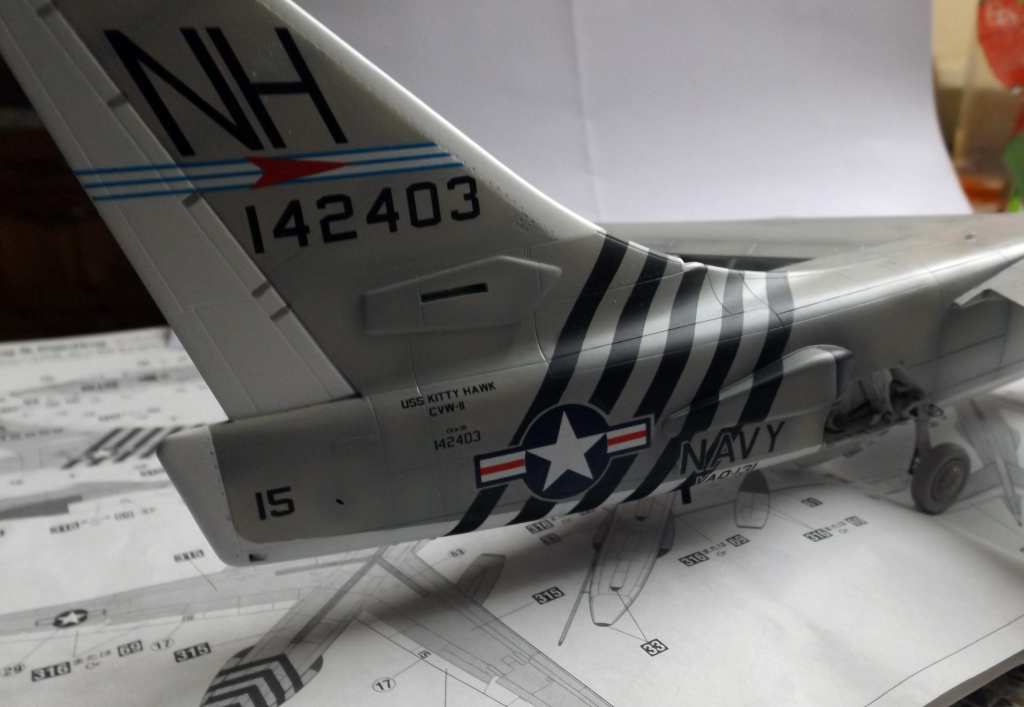
The time has come to also put some decals on the outside of the model. I started with the thin grey outlines around the “stars and bars”, where the tanker stripes are painted. To create those outlines I have cut out an appropriate shape out of clear decal paper and then I painted it with light grey Humbrol 129. The decal so prepared was put on the model, and the “star and bar” in turn went on top of that. A similar procedure was also necessary in case of the “NAVY” inscriptions:
I used several decal solvents for the dacels printed by Melius Manu – Micro Sol/Set, Mr Mark Softer and Solvaset – all of them worked good, and putting on the Melius Manu decals was a pleasure.
After applying all the decals and sealing them with clear varnish (sidolux/future) I went on to weather the aircraft, using the same method as with the horizontal stabilizers – a small amount of dark grey Humbrol 32 paint was thinned with turpentine and applied roughly to the panel lines. After drying for several minutes the excess of the wash was cleaned up with a Q-tip moistened with “Wamod” airbrush thinner. In places, where the panel lines were too shallow and the wash cleaned up completely, the panel lines were highlighted with a sharp pencil. Should the pencil slip, it is worth noting, that the “Wamod” airbrush thinner also cleans up the unwanted pencil lines.
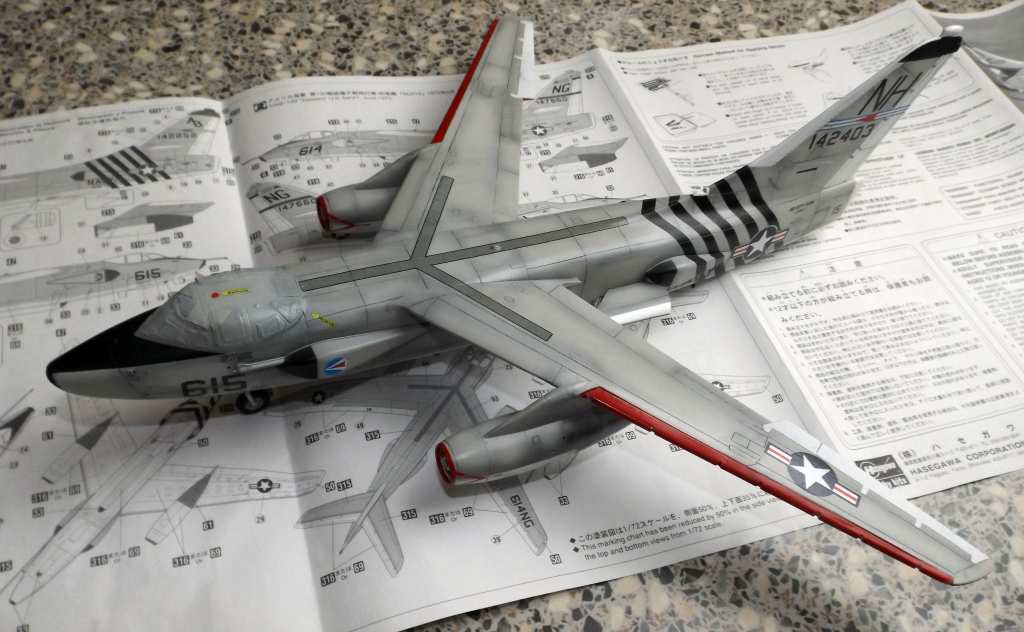
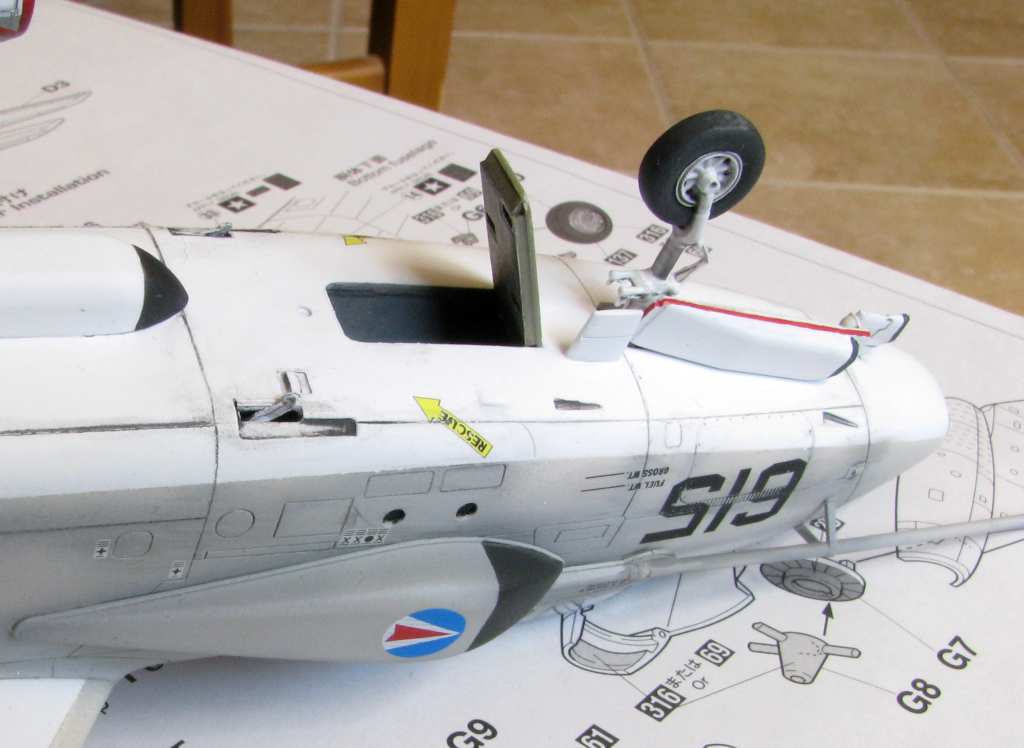
The next step was to cover the model with clear semi-gloss varnish Humbrol 135. This varnish blends the decals nicely with their background – they finally start to look painted on. After waiting for the semi-gloss coat to dry well I was finally able to take down the canopy masks. Luckily there were no nasty surprises under them:
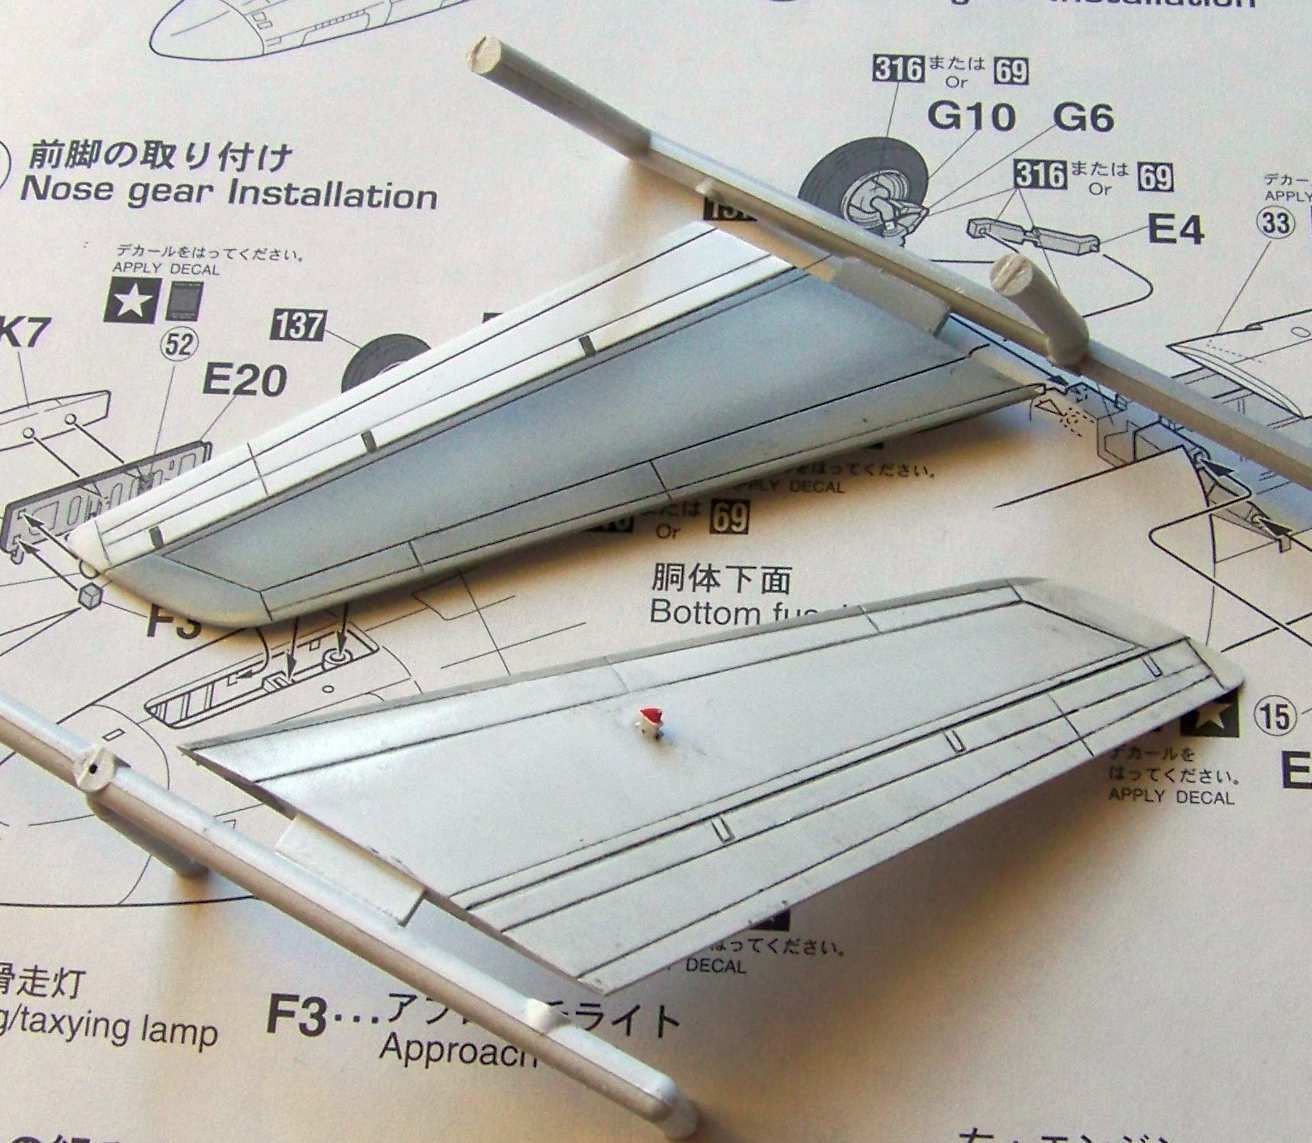
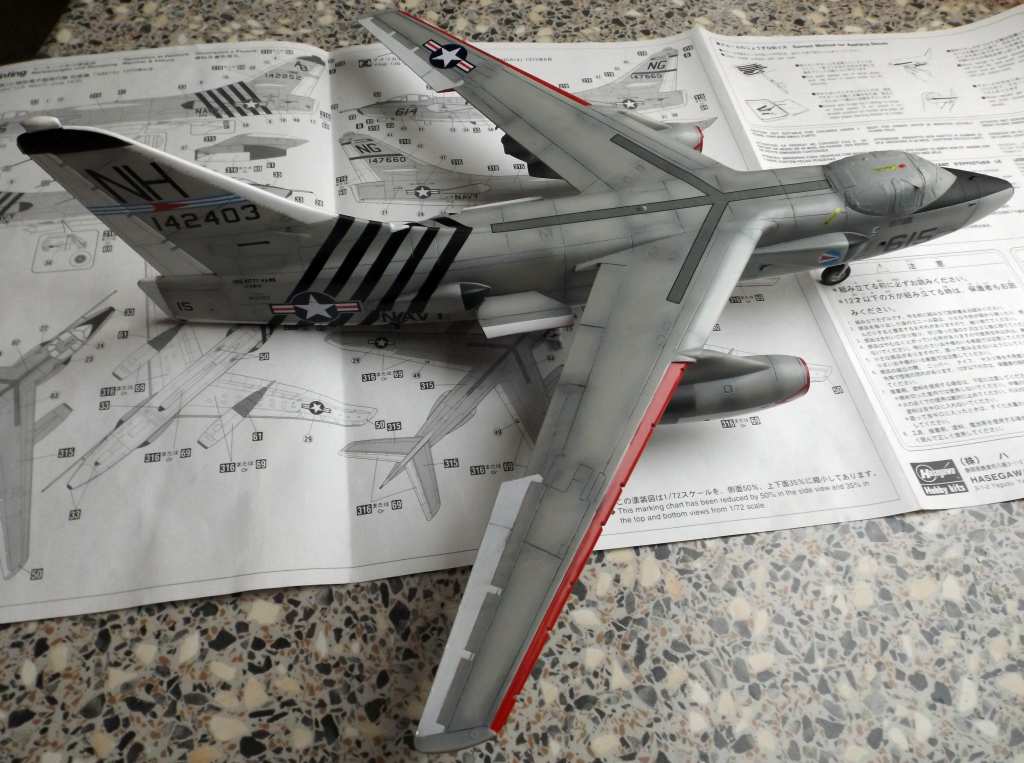
At this stage the flaps and slats were also installed. Especially the flaps needed some careful work to fit. I also installed the static charge dissipators to the trailing edges of the wings and the stabilizers – they were made out of thin plastic fishing line:
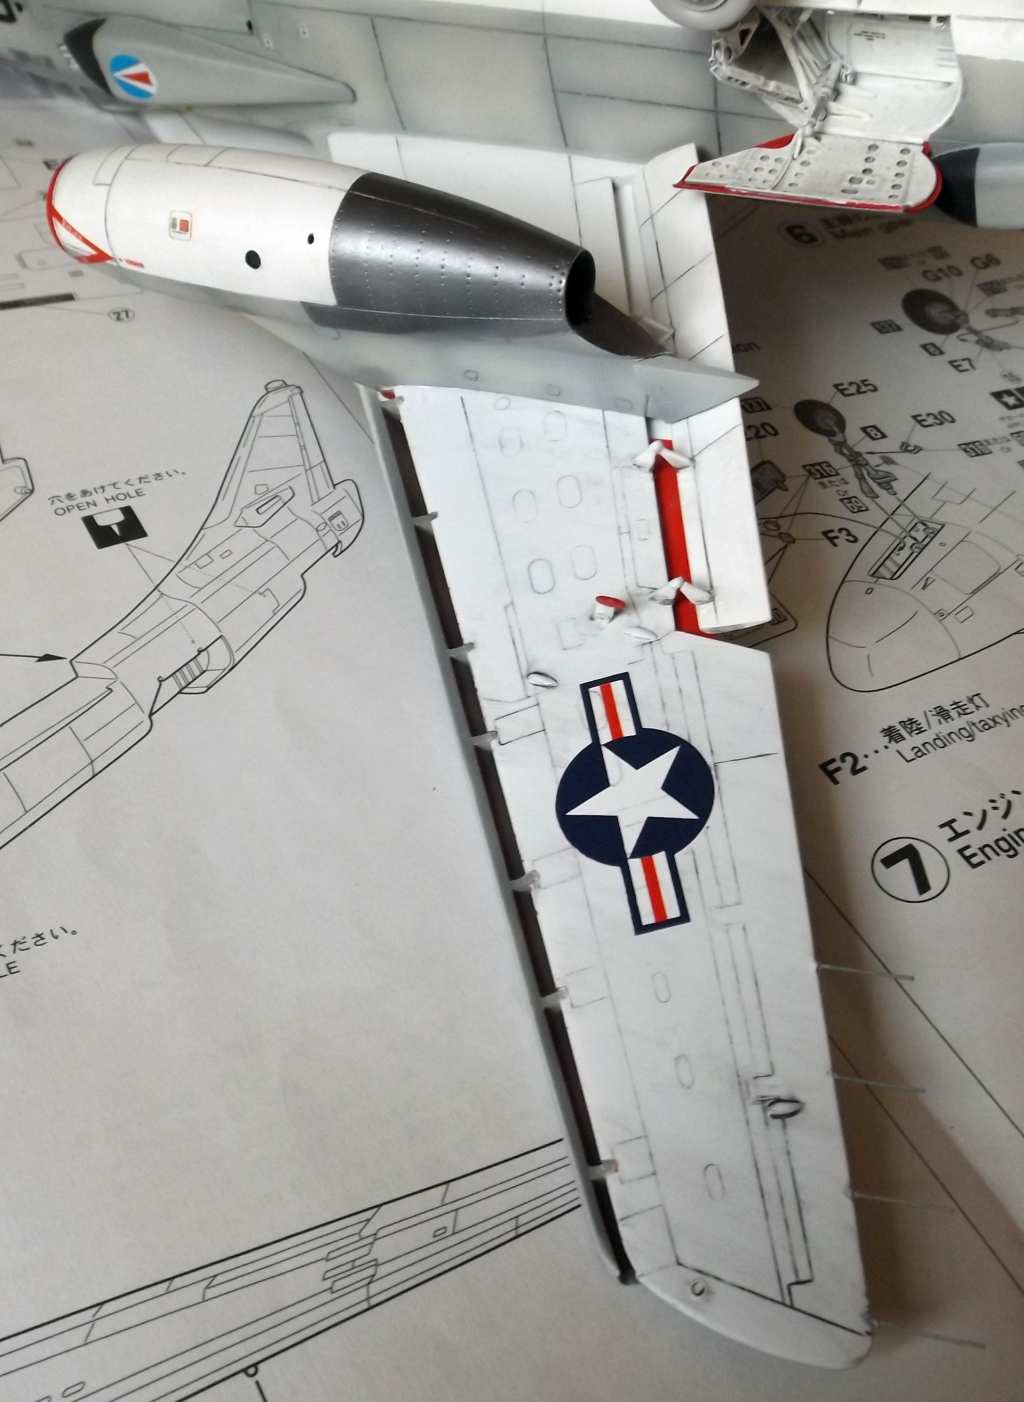
I have also installed the arrestor hook:
I made the wire antennae from stretched sprue. After fixing the ends I heated them gently and that automatically stretched them, nice and tight:

I also put a decal on the canopy to represent the AN/ARR-15 antenna:
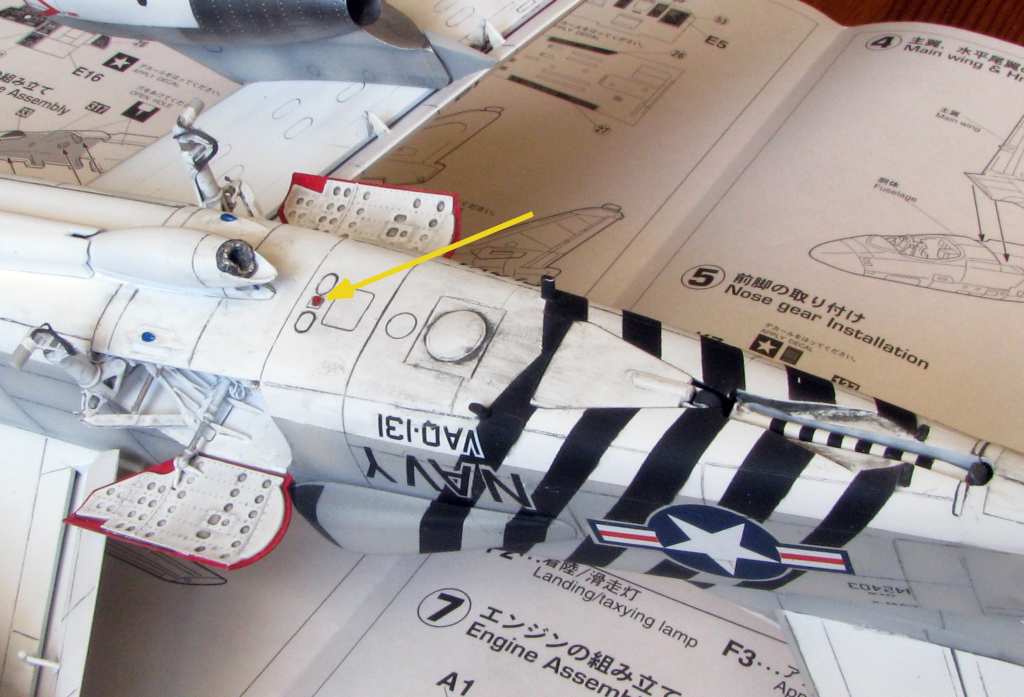
I also noted some missing detail on the lower fuselage – and added it: a tie-down ring at the arrestor hook base, the refuelling drogue and the holdback fitting (pointed to on the photo with a yellow arrow):
I also installed the crew entry hatch and the catapult bridle hooks (from the Eduard photoetched set):

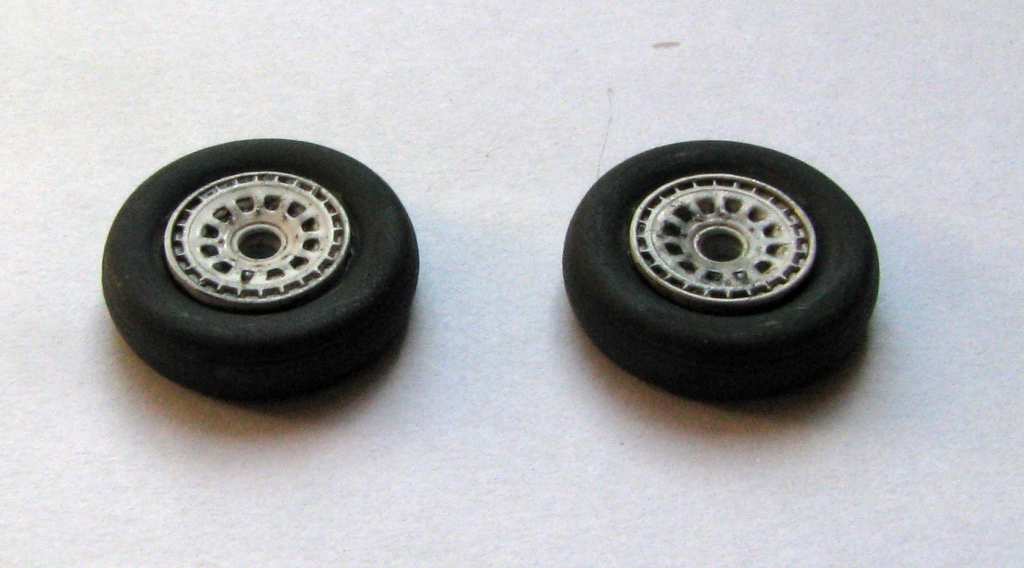
The last thing left to add were the correct wheels. Out of the box the wheels look like follows:
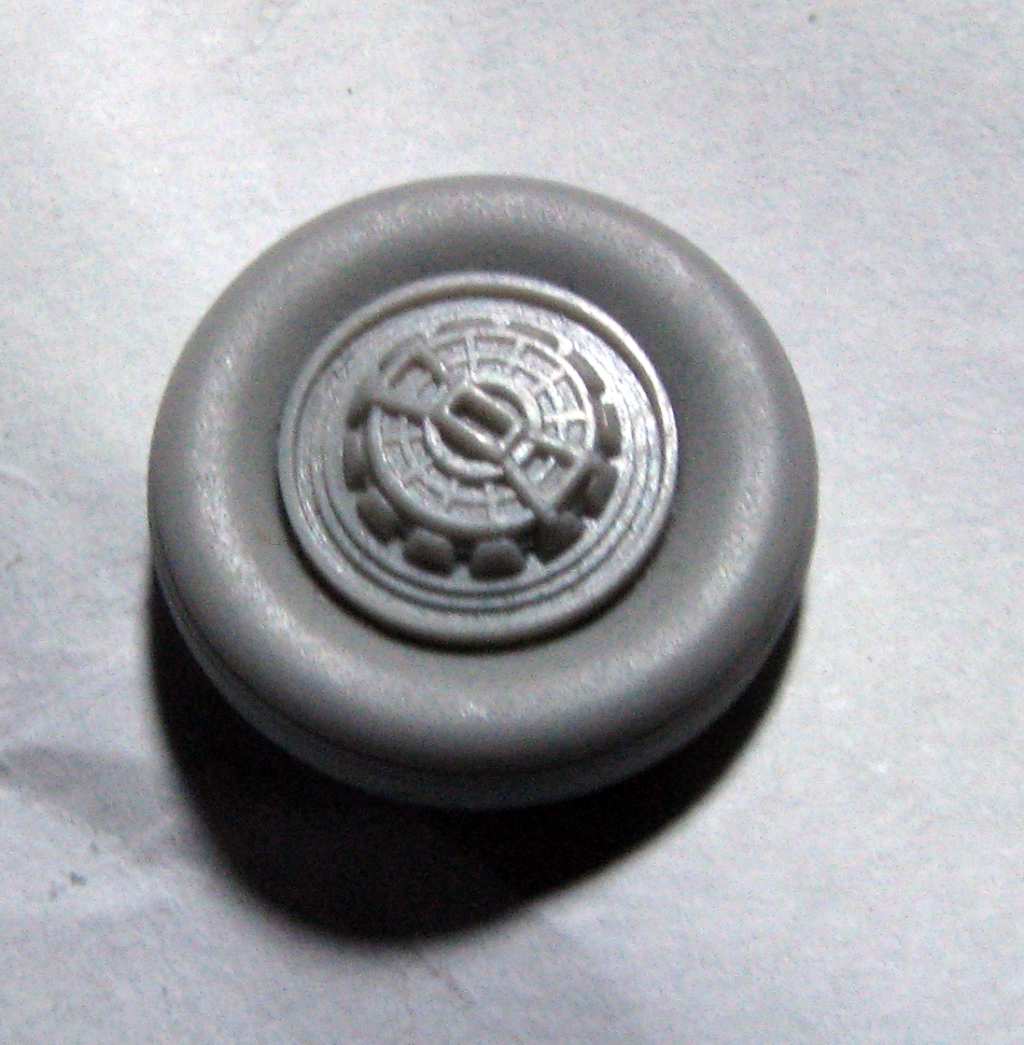
Wheels like that would be OK on the so called „Version” aircraft – like the TA-3B, RA-3B or EA-3B, but not for a bomber – and the EKA-3B belongs to the bombers, so it’s wheel, should look like on the photo below:

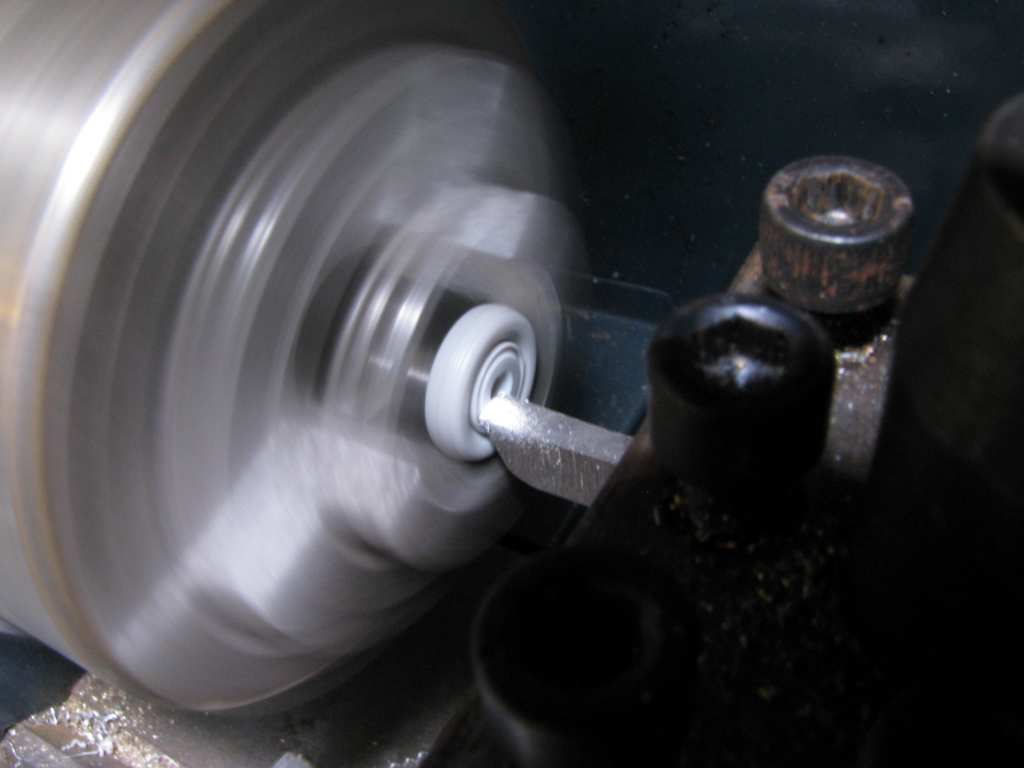
That meant work – first I removed the unwanted styrene from the kit wheels using my trusty small lathe:
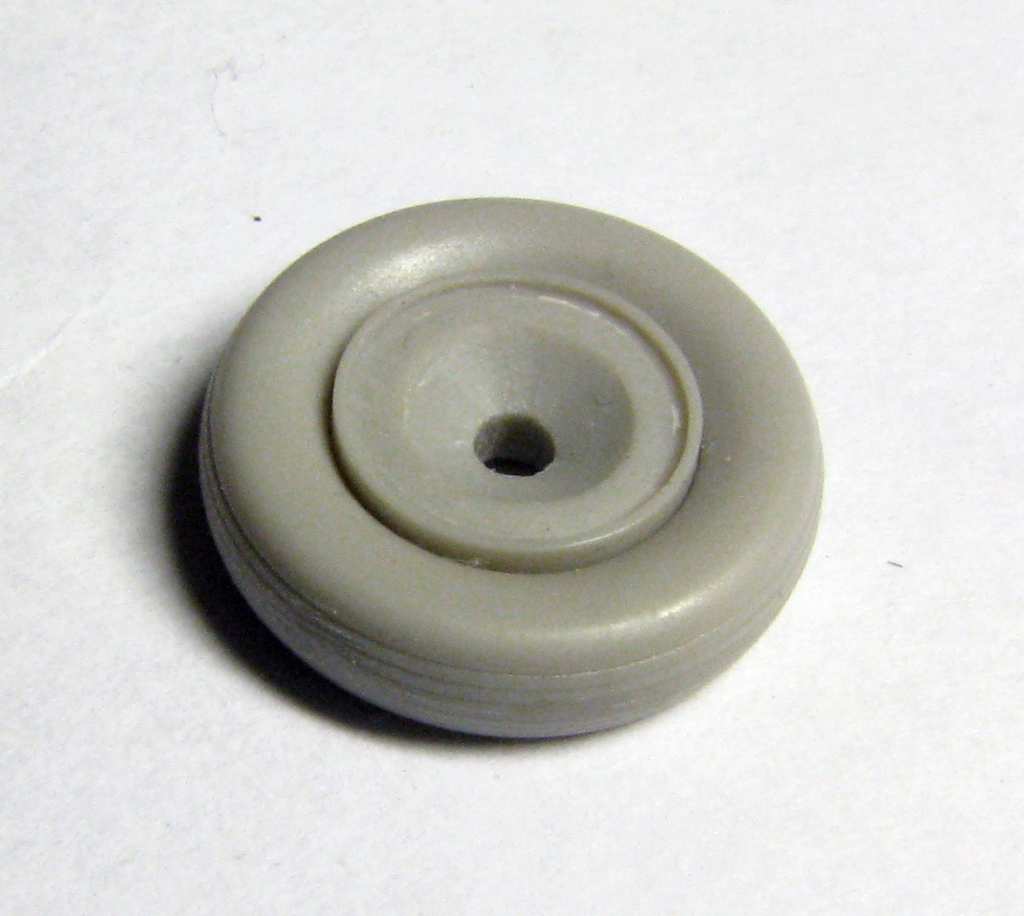
This way I got a „blank” wheel:
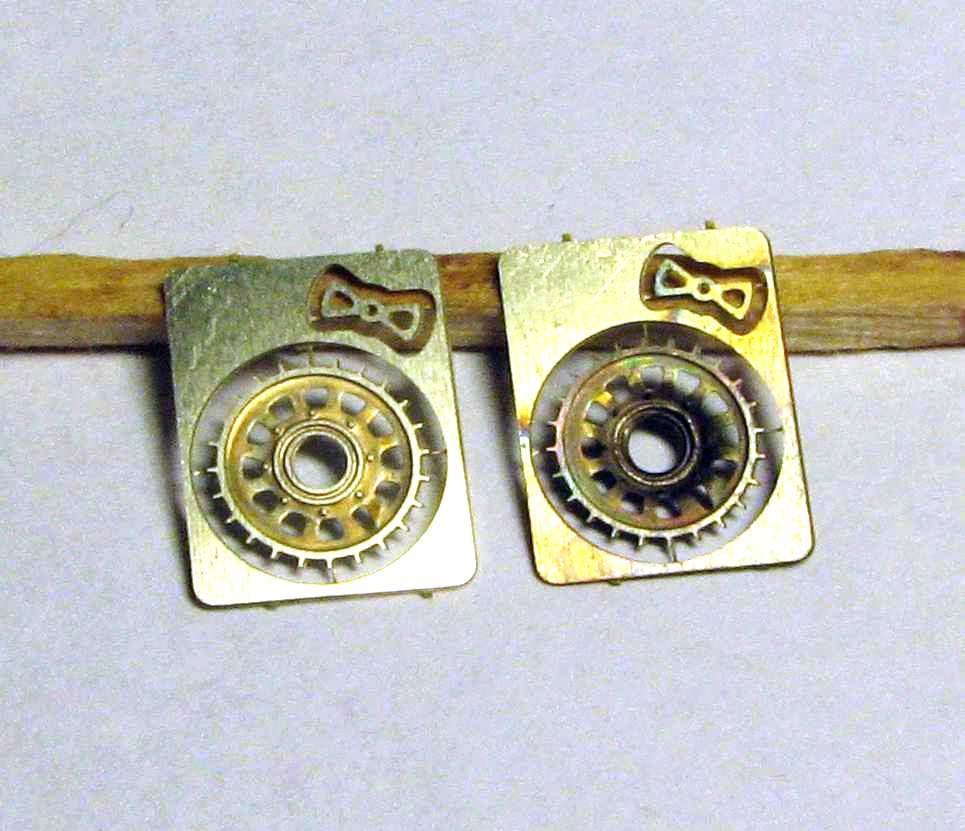
Now it was time to add some detail. To do this I designed my own custom photoetched parts using the CorelDRAW! Software. The Polish company Eaos etched the parts for me. After I got them I had to shape them. To do this I fabricated a simple die out of steel plate, and turned a fitting stamp out of brass rod. One gentle tap with a hammer, and the parts are stamped. On the photo below on the left you can see the part “before” – straight from etching, and on the right, the part “after” – already stamped. On the part on the right you can see the heat discoloration – I used a propane torch to anneal the arts before stamping to make them softer and to prevent them from cracking.
Cutting the parts out and gluing them on the wheels was a pure formality now:
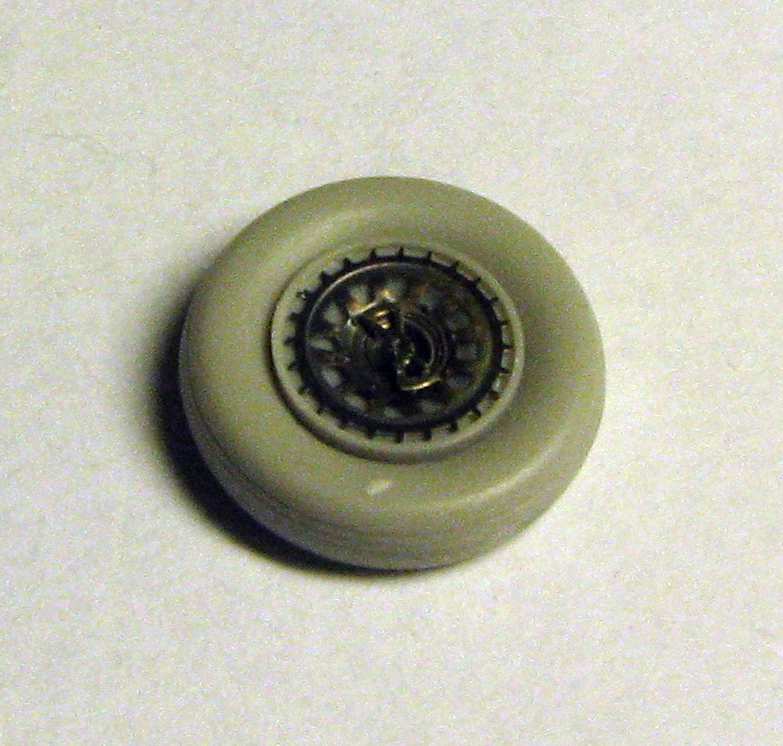
Next, the wheels were painted and weathered with a black wash:
And lastly put on the model: